CryoFM1: Sampling
Prerequisites
Before using CryoFM1, ensure you have:
1. Install CryoFM with compatible dependencies
CryoFM1 uses the HDiT model architecture, which depends on the natten package. Different versions of natten have varying requirements for PyTorch and CUDA versions. For a reproducible installation, follow these steps:
# natten 0.17.5 uses type union syntax, you must use python >=3.10
conda create -n cryofm python=3.10 -y
conda activate cryofm

# Install PyTorch 2.5.1 with CUDA 12.4 support
pip install torch==2.5.1 torchvision==0.20.1 --index-url https://download.pytorch.org/whl/cu124

# Install natten 0.17.5 compatible with PyTorch 2.5.0 and CUDA 12.4
pip install natten==0.17.5+torch250cu124 -f https://whl.natten.org

# Clone and install CryoFM
git clone https://github.com/ByteDance-Seed/cryofm
cd cryofm
pip install .
2. Download model checkpoints and configuration files
CryoFM1 model weights and configuration files are available for download from the Hugging Face repository. To download the model weights, first install the Hugging Face CLI tool:
Then download all model files using: This will download all necessary model files (includingcryofm-s and cryofm-l) to the ./cryofm-v1 directory. You can change ./cryofm-v1 to your preferred download location.
Basic Usage
CryoFM-S: Unconditional Generation
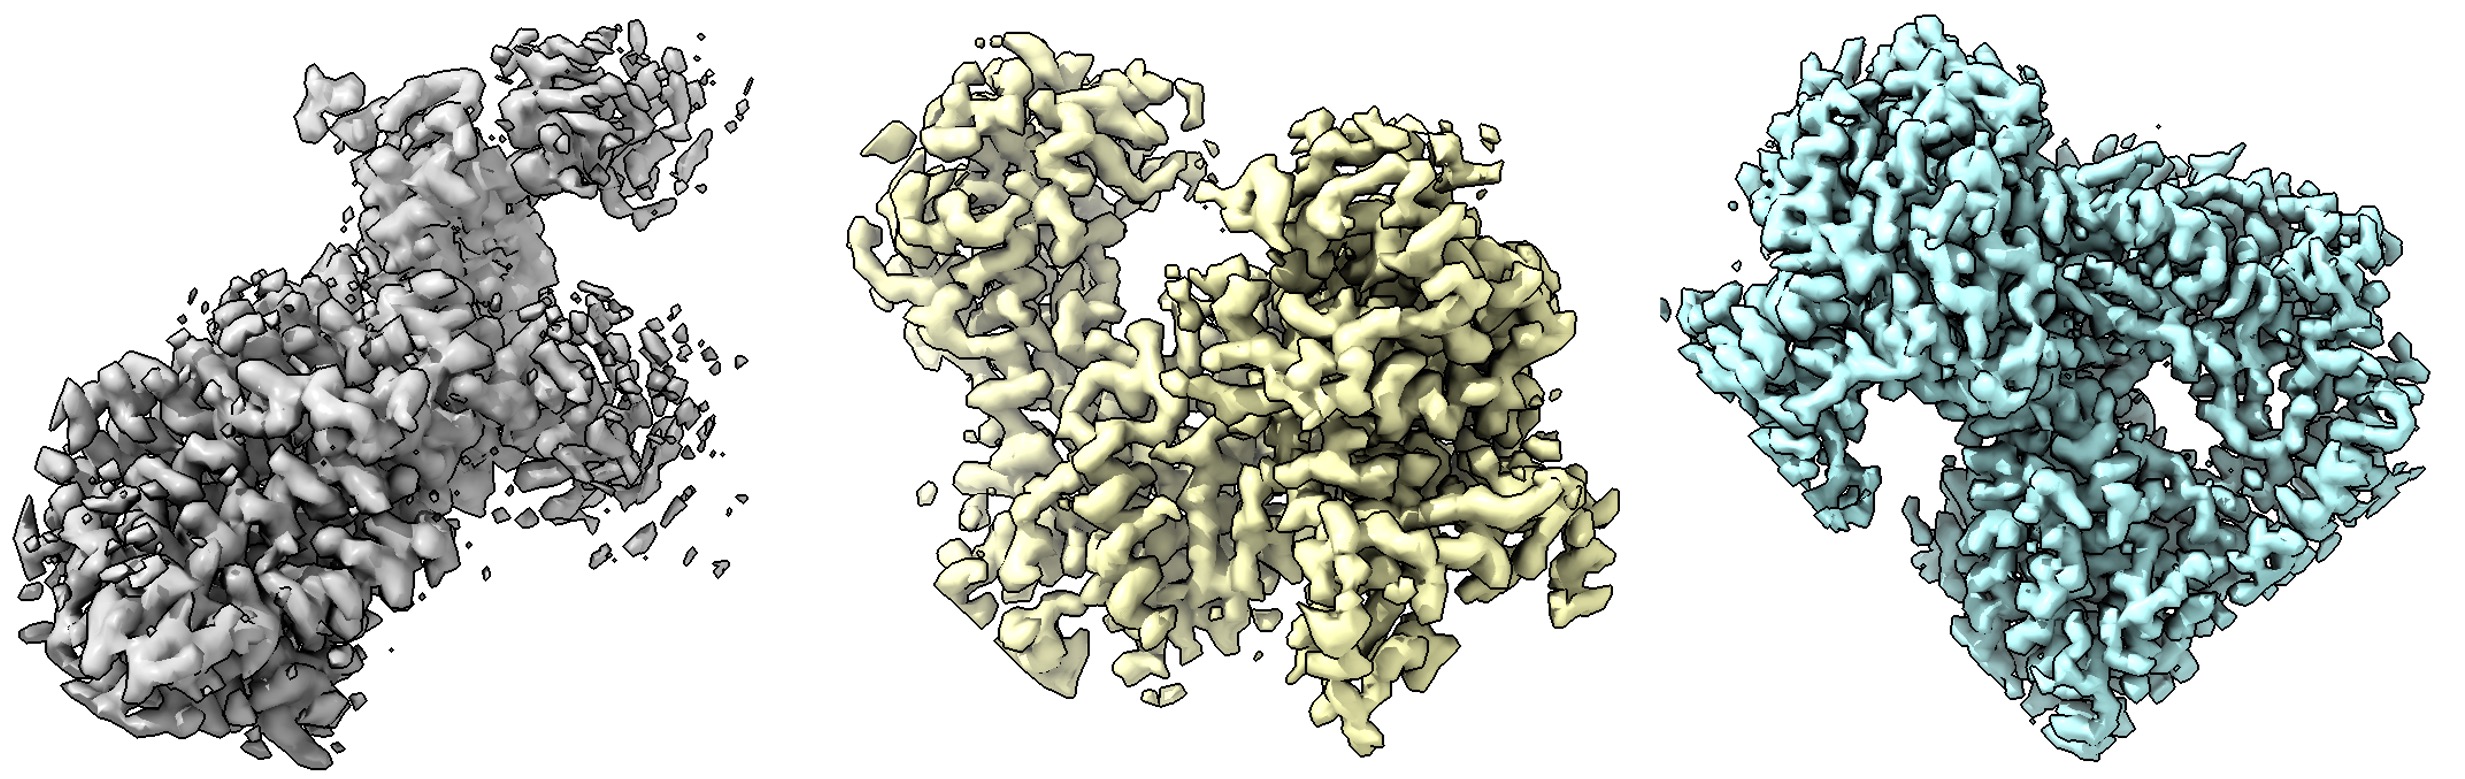
CryoFM-S generates 64×64×64 voxel density maps at 1.5 Å/pixel resolution. Example outputs are shown below:
import torch
from mmengine import Config
from cryofm.core.utils.mrc_io import save_mrc
from cryofm.projects.cryofm1.lit_modules import CryoFM1
from cryofm.core.utils.sampling_fm import sample_from_fm

# Load configuration and model
cfg = Config.fromfile("path_to/cryofm-v1/cryofm-s/config.yaml")
lit_model = CryoFM1.load_from_safetensors(
    "path_to/cryofm-v1/cryofm-s/model.safetensors",
    cfg=cfg
)

# Set up device and model
device = torch.device("cuda" if torch.cuda.is_available() else "cpu")
lit_model = lit_model.to(device)
lit_model.eval()

# Define vector field function for flow matching
def v_xt_t(_xt, _t):
    return lit_model(_xt, _t)

# Generate samples
# Note: Enable bfloat16 if your GPU supports it for better performance
with torch.no_grad(), torch.autocast("cuda", dtype=torch.bfloat16):
    out = sample_from_fm(
        v_xt_t,
        lit_model.noise_scheduler,
        method="euler",
        num_steps=200,
        num_samples=3,
        device=device,
        side_shape=64
    )
    # Apply z-scaling normalization if configured
    if hasattr(lit_model.cfg, "z_scale") and lit_model.cfg.z_scale.mean is not None:
        out = out * lit_model.cfg.z_scale.std + lit_model.cfg.z_scale.mean

# Save generated density maps
for i in range(3):
    save_mrc(
        out[i].float().cpu().numpy(),
        f"sample-{i}.mrc",
        apix=1.5  # Angstroms per pixel
    )
CryoFM-L: Unconditional Generation
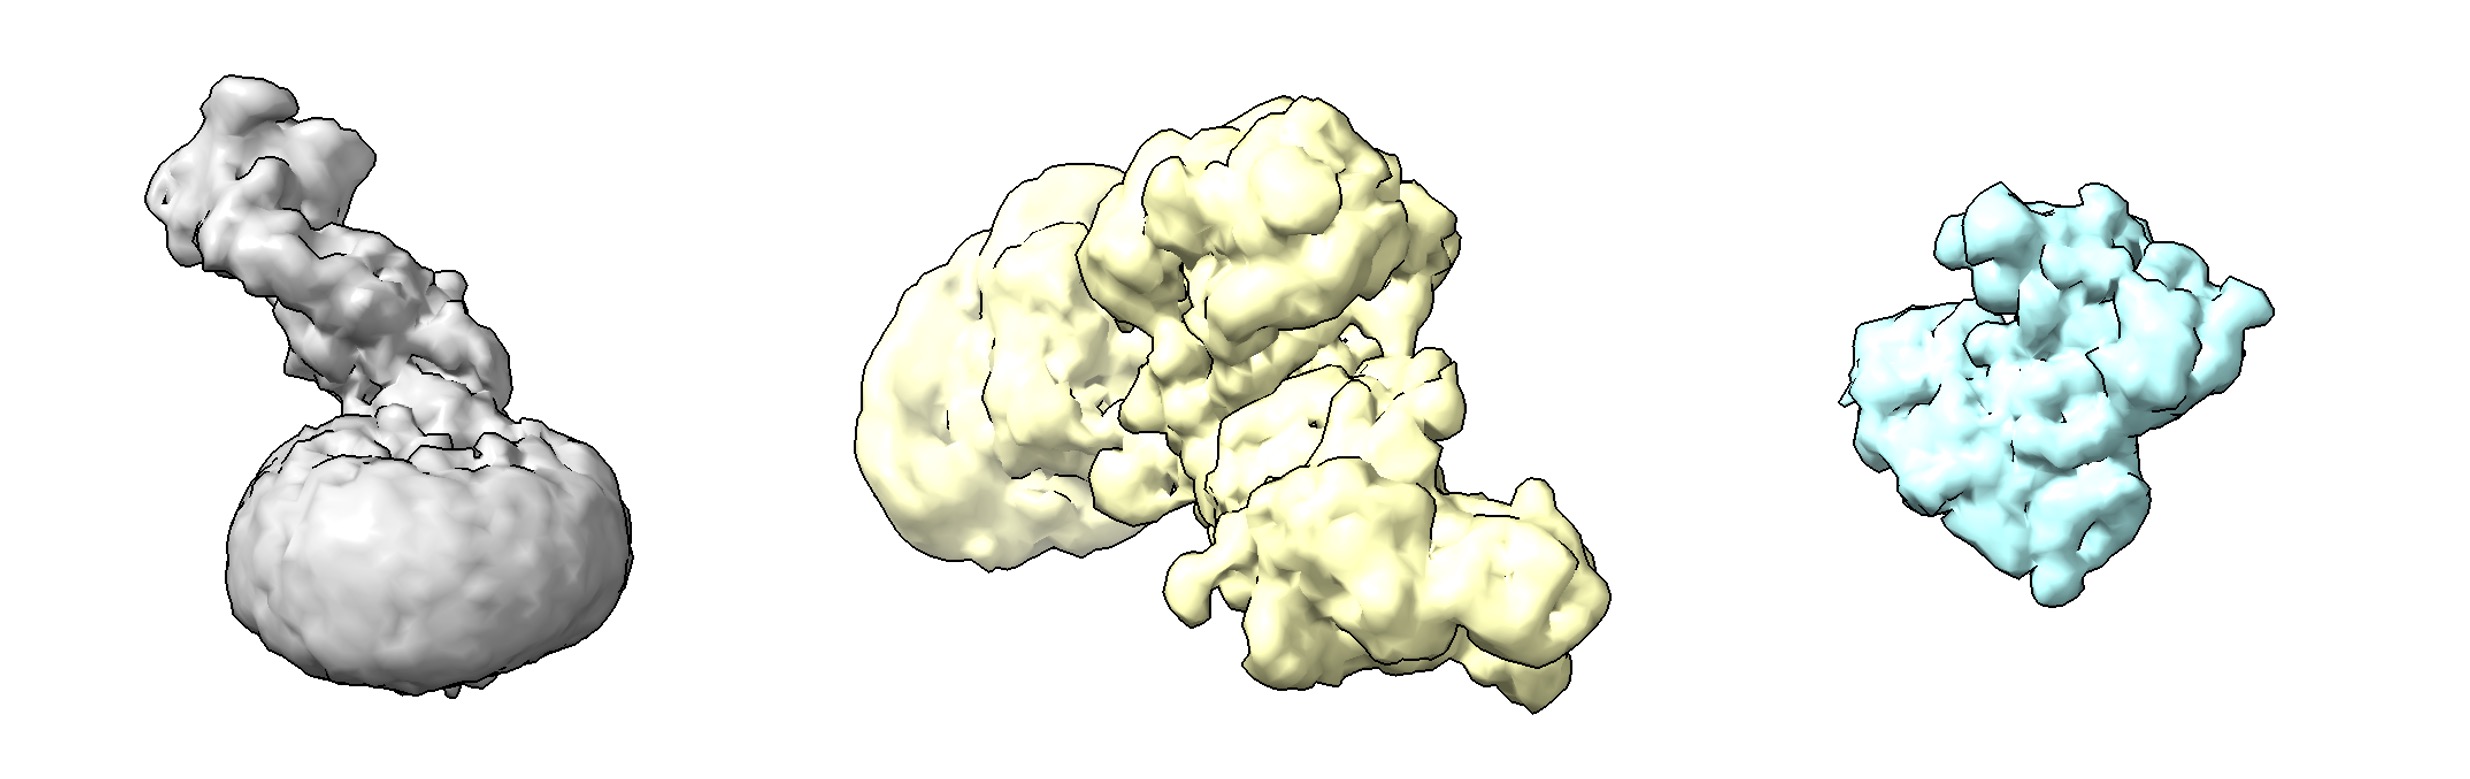
CryoFM-L generates 128×128×128 voxel density maps at 3.0 Å/pixel resolution. Example outputs are shown below:
import torch
from mmengine import Config
from cryofm.core.utils.mrc_io import save_mrc
from cryofm.projects.cryofm1.lit_modules import CryoFM1
from cryofm.core.utils.sampling_fm import sample_from_fm

# Load configuration and model
cfg = Config.fromfile("path_to/cryofm-v1/cryofm-l/config.yaml")
lit_model = CryoFM1.load_from_safetensors(
    "path_to/cryofm-v1/cryofm-l/model.safetensors",
    cfg=cfg
)

# Set up device and model
device = torch.device("cuda" if torch.cuda.is_available() else "cpu")
lit_model = lit_model.to(device)
lit_model.eval()

# Define vector field function for flow matching
def v_xt_t(_xt, _t):
    return lit_model(_xt, _t)

# Generate samples
# Note: Enable bfloat16 if your GPU supports it for better performance
with torch.no_grad(), torch.autocast("cuda", dtype=torch.bfloat16):
    out = sample_from_fm(
        v_xt_t,
        lit_model.noise_scheduler,
        method="euler",
        num_steps=200,
        num_samples=3,
        device=device,
        side_shape=128
    )
    # Apply z-scaling normalization if configured
    if hasattr(lit_model.cfg, "z_scale") and lit_model.cfg.z_scale.mean is not None:
        out = out * lit_model.cfg.z_scale.std + lit_model.cfg.z_scale.mean

# Save generated density maps
for i in range(3):
    save_mrc(
        out[i].float().cpu().numpy(),
        f"sample-{i}.mrc",
        apix=3.0  # Angstroms per pixel
    )
Advanced Usage
Sampling Methods
The sample_from_fm function supports multiple ODE solvers for the flow matching process:
"euler": Euler method (default, fastest)"rk4": 4th-order Runge-Kutta method (more accurate, slower)"midpoint": Midpoint method (balanced)"heun": Heun's method"ralston": Ralston's method
For most use cases, "euler" with 200 steps provides a good balance between quality and speed. For higher quality, consider using "rk4" or increasing num_steps.
Adjusting Sampling Parameters
num_steps: Number of integration steps (default: 200). More steps generally yield better quality but take longer.num_samples: Number of samples to generate in a single batch.side_shape: Spatial dimensions of the output volume (64 for CryoFM-S, 128 for CryoFM-L).