CryoFM2: GUI Demo
CryoFM2 provides a Gradio-based graphical user interface (GUI) demo that allows users to interactively process density maps through a web interface.
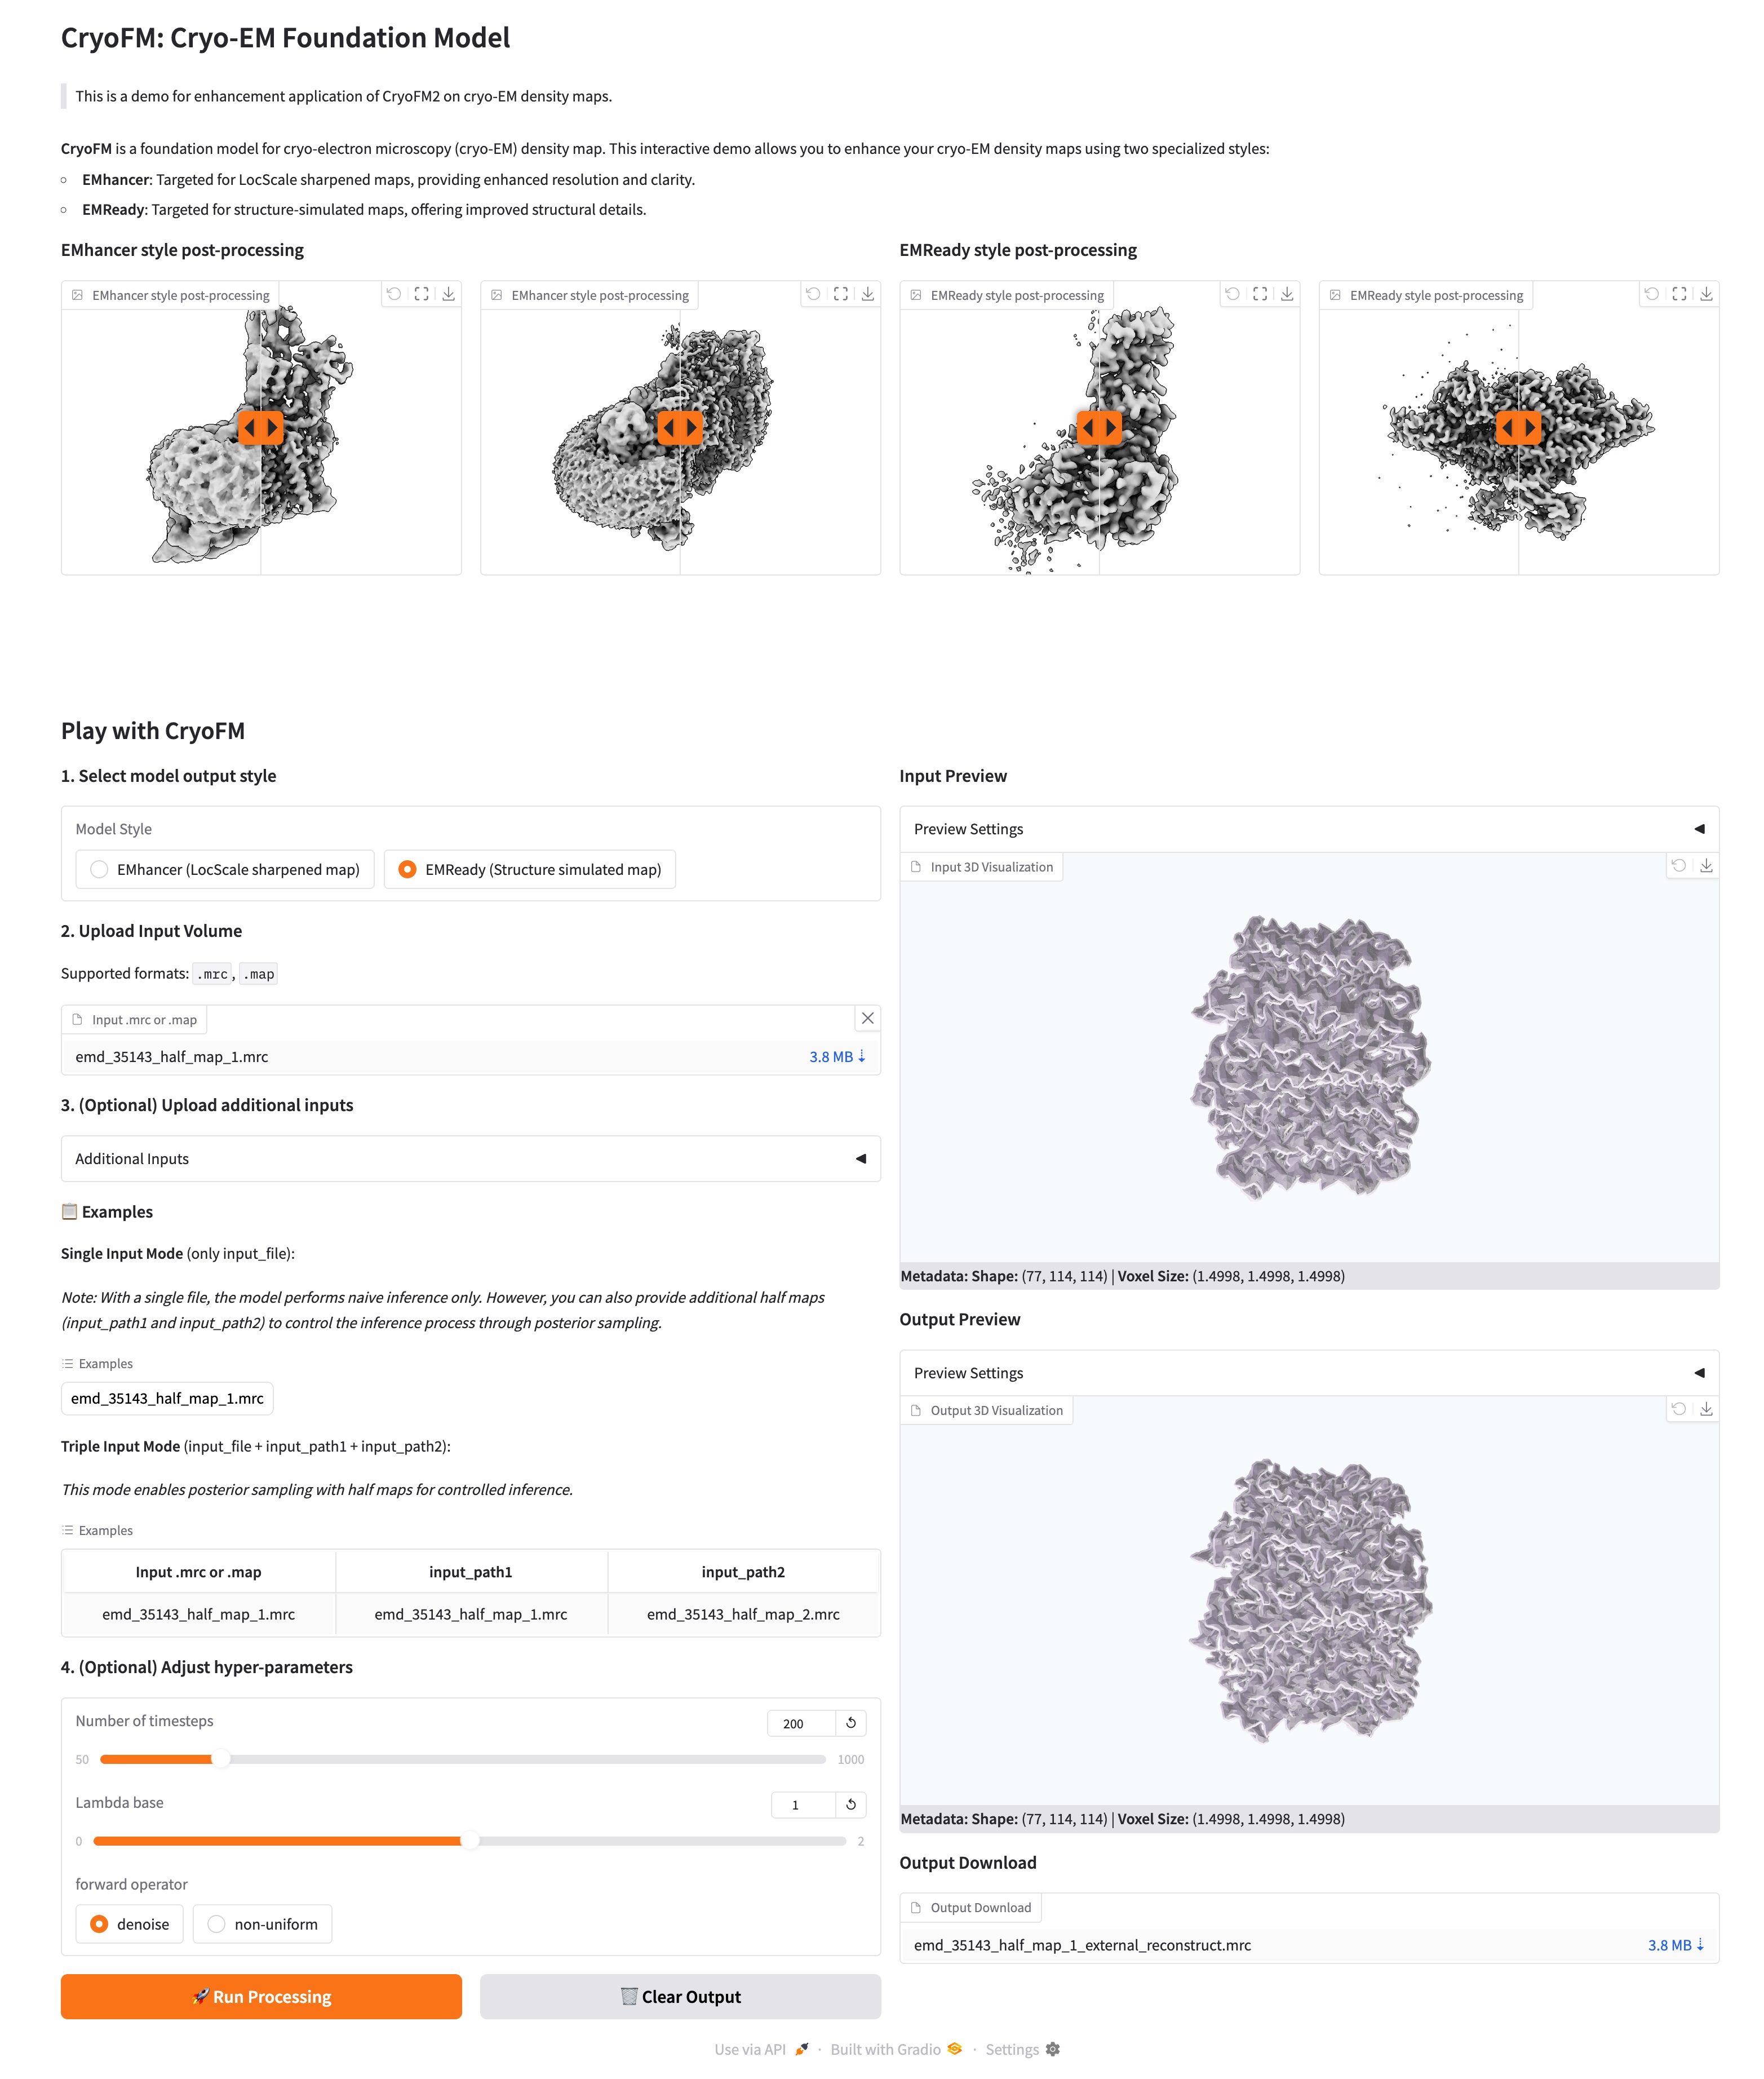
Preview
Running the GUI Demo Locally
To use the GUI demo, you need to switch to the gradio-demo branch and run it locally.
How to use
First, switch to the gradio-demo branch:
Then, set up the environment and run the demo:
conda create -n cryofm python=3.10 -y
conda activate cryofm
pip install -r requirements.txt
python app.py
After starting, you should see information similar to:
Open the displayed URL (usually http://127.0.0.1:7860) in your browser to use the GUI interface.
Note: If you need to access Hugging Face through a proxy, make sure to exclude local addresses (localhost, 127.0.0.1) from the proxy settings. Example:
NO_PROXY="localhost,127.0.0.1,::1,.example.com,*.example.com" \
no_proxy="localhost,127.0.0.1,::1,.example.com,*.example.com" \
HTTP_PROXY="http://proxy.example.com:8080" \
HTTPS_PROXY="http://proxy.example.com:8080" \
http_proxy="http://proxy.example.com:8080" \
https_proxy="http://proxy.example.com:8080" \
python app.py
Features
The GUI demo typically provides the following features:
- Upload density maps: Support uploading a single density map or extra pair of half maps
- Select model: Choose different CryoFM2 model variants (emhancer, emready)
- Select operation: Choose different processing operations (denoise, non-uniform)
- Adjust parameters: Tune various processing parameters through sliders and input fields
- Real-time preview: View visual previews of processing results
- Download results: Download processed density maps